
Late-game positioning is where PUBG matches are won or lost. When the circles get smaller and the blue zone damage starts hitting hard, smart movement matters more than gun skill. Many players make the mistake of chasing kills in the closing moments, but the truth is simple good positioning increases your chances of winning far more than rushing fights.
Here’s a clean, simple breakdown of how final-circle zones work on Erangel, why certain areas show up again and again, and how you can rotate safely without getting trapped or shredded by the blue.
Why Final-Circle Positioning Matters
From Phase 5 onward, the zone begins shrinking faster and dealing almost nonstop damage. By Phase 7, no player can realistically out-heal the blue, no matter how many First Aid Kits they carry. These circles usually appear after 20–30 minutes and push every team into tight, stressful fights.
Players who master positioning in these zones have far better survival rates. In fact, stats show that survivors of the late phases usually succeed because they reached the safe zone early, not because they took the most fights.
Most Common Final Zones on Erangel
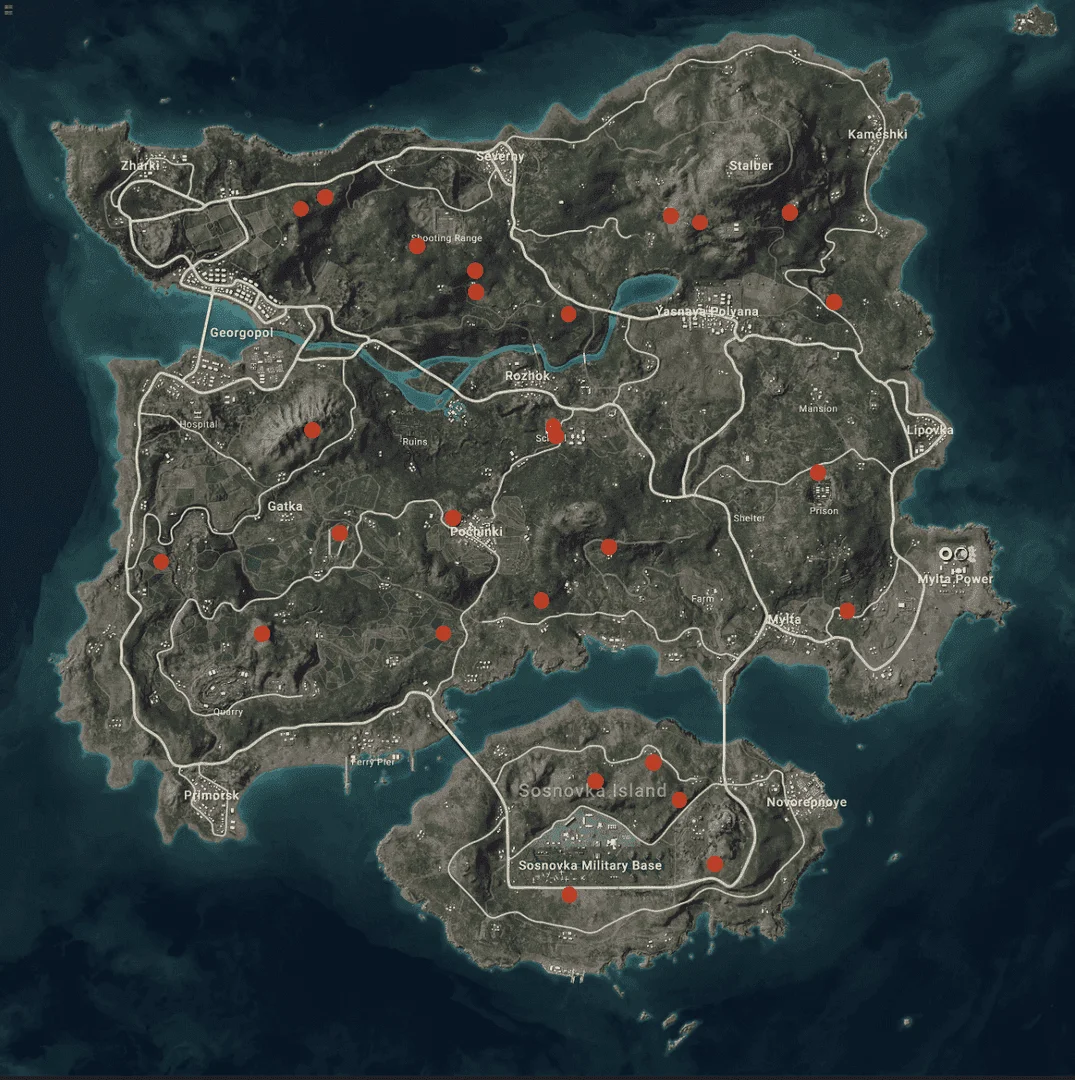
After studying hundreds of match endings, one pattern is clear central zones dominate the final circles.
Erangel’s end circles tend to appear in these areas most often:
Urban Zones (Approx. 60% of finals)
- Pochinki: The most common final-circle town. The church area offers height and strong cover.
- Georgopol (containers + apartments): Lots of vertical fights and long sightlines.
- School/Rozhok area: A mix of open fields and buildings, making rotations tricky.
Rural Zones (Approx. 30%)
- The Crater near Lipovka: Five warehouses inside sunken terrain; stable cover and spread.
- Water City: Flooded houses and rooftops force careful movement.
Isolated / High-ground Zones (Approx. 10%)
- Stalber: Height advantage can completely control the lobby.
- Prison/Rocky Valleys: Terrain that rewards early high-ground takeover.
- Military Base: Only safe with early bridge control or a boat rotation.
These patterns exist for a reason. Erangel’s zone algorithm tends to close toward the center and around built-up areas with enough cover to force late fights.
Pre-Positioning Tips for Final Zones
You don’t win late game by reacting you win by preparing early. A few simple habits can make a huge difference:
- Always secure a vehicle before Phase 2
- Carry at least 4 smoke grenades
- Keep 5+ First Aids and energy boosts
- Maintain 150+ bullets for your main gun
- Avoid the outer edge of the map past Phase 4
- Move early late rotations cause over half of eliminations
One extra tip: airdrops often land inside future zones, making them a good indicator of where the game may end.
How to Hold Buildings and Compounds
Some locations are naturally stronger than others. Understanding building control can save your squad:
Pochinki Church Area
- Strong stone structure
- High tower vision
- Multiple entrances to play around
Best building positions
- Ground Floor: Safe cover but low visibility
- Second Floor: Best balance of safety and angles
- Rooftop: Perfect view but exposed play only when necessary
Look for compounds with:
- Nearby natural cover (trees, rocks, dips)
- Escape routes for last-second rotations
- Good sightlines over surrounding terrain
Movement and Rotation Basics
Rotating safely is the difference between a top-5 finish and an instant wipe.
- Move when you hear third-party fights to mask audio
- Keep 20 meters between squad members to avoid grenade wipes
- Park vehicles at 45-degree angles behind buildings for cover and fast escape
- Use ridges and dips instead of running across open fields
- Drop smokes before you move, not while running
Avoid bridge rotations in late game unless you absolutely must they are too predictable and easy to gatekeep.
Terrain Tips for Erangel
- High ground increases survival more than any other factor
- Rocks offer the strongest cover
- Trees hide you but cannot stop bullets
- Tall grass helps with concealment, but you’re helpless if spotted
- Water zones slow players down and create predictable movement paths
If you find a hill with multiple safe routes down (like the Rozhok hill), you can control the zone until the final seconds.
Best Utility Usage in Final Circles
Good utility wins end games. Keep things simple:
- Use smokes for rotation
- Use frags for clearing buildings
- Use Molotovs for blocking doorways and pushing enemies out
- Use stuns for quick entry fights
A smart player uses grenades first and bullets second.
Squad vs Solo Positioning
Squad Tips
- Establish roles:
- Marksman
- Entry fragger
- Support
- IGL
- Communicate with accurate callouts
- Create crossfire angles
- Don’t stack in one building or room
Solo Tips
- Avoid open fights
- Play the edge quietly
- Third-party everything you can
- Stay hidden until the last players fight
- Save smokes for the top-3 moments
Patience wins solos.
Common Positioning Mistakes
- Rotating too late
- Staying in one house too long
- Not using smokes
- Running into open fields
- Over-healing instead of rotating
- Forgetting to check high ground
Fixing these alone will improve your placement dramatically.
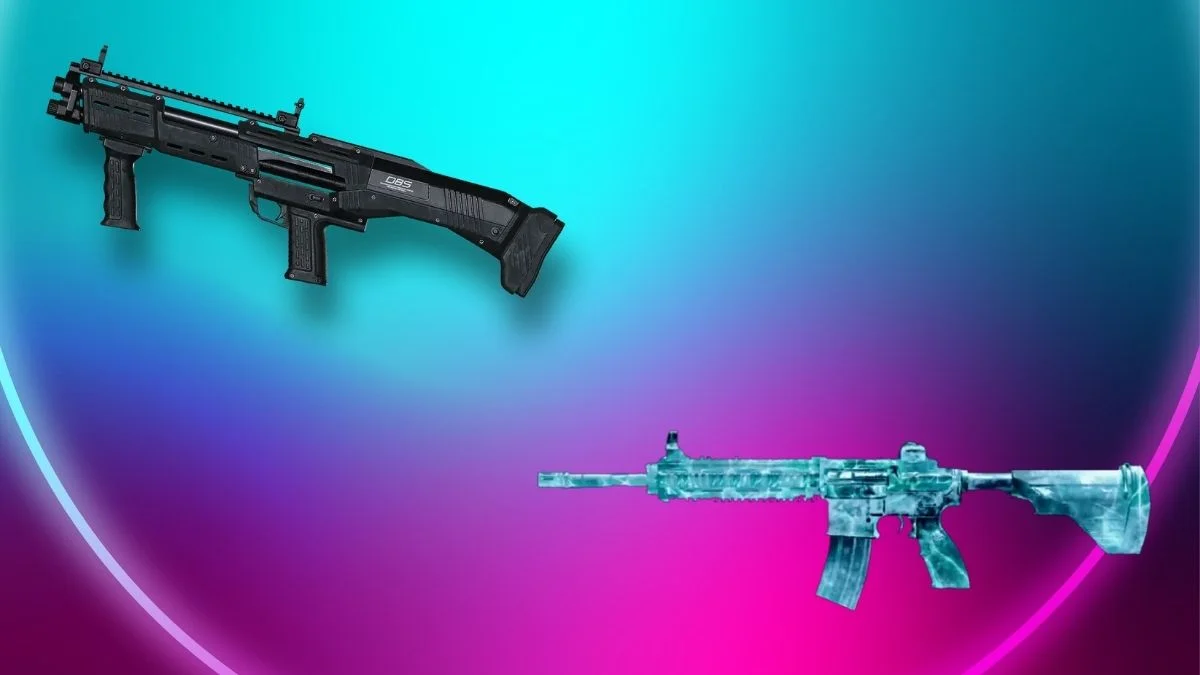
Final Loadout for Late-Game

Keep it simple and stable:
- M416 + S12K (balanced pressure setup)
- or M416 + DBS (damage setup)
- 6x scope (switchable to 3x)
- Level 3 gear
- 4-6 smokes
- 150+ AR ammo
- Full boosts
This setup handles every type of final circle urban, rural, or mountainside.
Also Read: GTA 6 Delayed Again: New Release Date And Why Rockstar Waits